

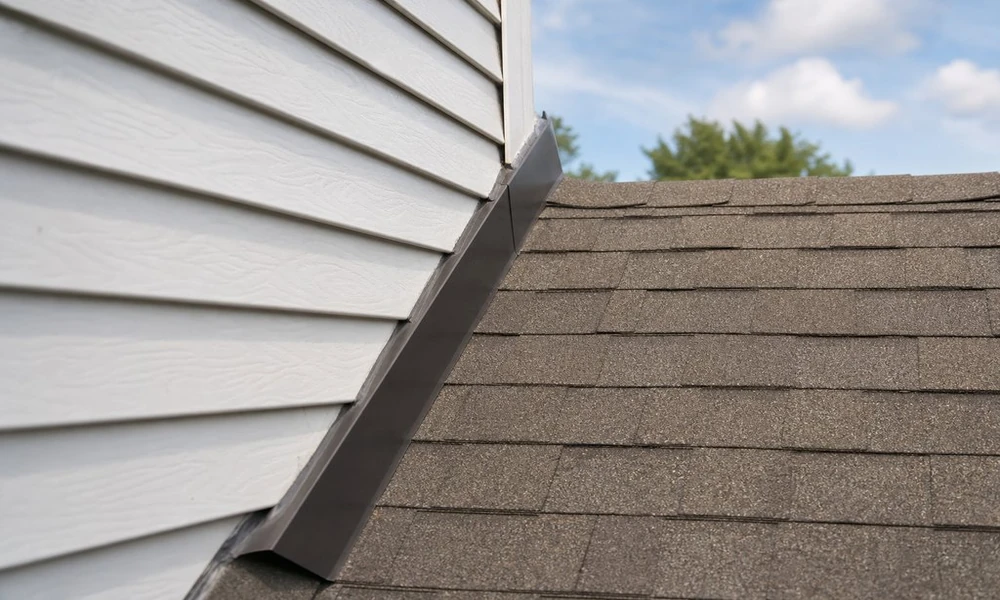
Roof-to-wall flashing
Stains on your ceiling or walls are often near bump outs such as a dormer, addition, another story or even a chimney. If you follow the stains inside back to their source, they may lead you to an area where a wall meets a roof.
Wall and Roof Intersections
Roofs are designed to dump a lot of water downhill. Walls that intersect the roofs, however, point the other way. Because of this, flashing is required where the wall and roof intersect. The flashing is there to prevent water from sneaking behind whatever material is used on the wall (be it masonry, siding, trim etc.).
Leaks here can be devious. Since there is so much material protecting this flashing (roofing, siding, stucco, paint, etc.), it can take quite a while for drips to be seen inside. By the time you do see water coming inside, however, the leaks may have caused plenty of damage to paint, sheetrock, insulation and even structural framing.
The flashing at the transition from wall to roof is usually made up of lots of small L-shaped pieces of metal. Each one is tucked in under a single row of shingles and overlaps the piece under it. As the shingles go up the roof in overlapping rows, so too does this flashing. Thus, this type of flashing is often called step flashing – if you want the source, it’s https://www.en.wikipedia.org/wiki/Flashing_%28weatherproofing%29. At the top edge, it will often be covered over by some sort of counterflashing or siding to prevent water getting over the top of the individual pieces of step flashing.
Common Leak Sources
Leaks at these transitions from roof to wall could be due to any number of items.
The flashing may be in pretty rough shape to start with. Flashing pieces may be missing, poorly installed (not overlapping correctly), badly rusted, or bent out of shape. Flashing should never consist of long strips of metal instead of lots of little pieces. Not only will leaks occur easier, but these longer pieces can inhibit draining as well.
Over the years, it’s possible for a building to move slightly and this can separate flashing.
Any sealant which may have been used as a backup to hold out leaks in the past may have dried up and allow water to get behind it now.
If the siding (or whatever wall cladding is used) was installed directly to the shingles rather than leaving about a 1″ gap between the bottom of the siding and the roof, leaks can result. Not only will drainage be inhibited, but the siding may wick water to the wall.
Shingles may have started to deteriorate where they meet the wall. Any cracks, lifting, or wear in this area should be watched out for.
It’s always a good idea to keep the transition from roof to wall clear of any debris. Leaves or other items may work their way here and stay caked on, allowing leaks to occur.
Inspection and Diagnosis
If you think you have a leaky area where a wall and roof meet, look for any of these things:
If the house has been rained on steadily and you’re able to gain access to the area from within the attic (or upper story if it’s a first story wall), you might see evidence of dampness where a leak has occurred. Be sure to rule out the possibility that stains seen on ceilings or walls are the results of anything besides bad wall flashing. Bad plumbing, condensation or lots of hail (which damages shingles anywhere, not just near walls) could cause similar problems.
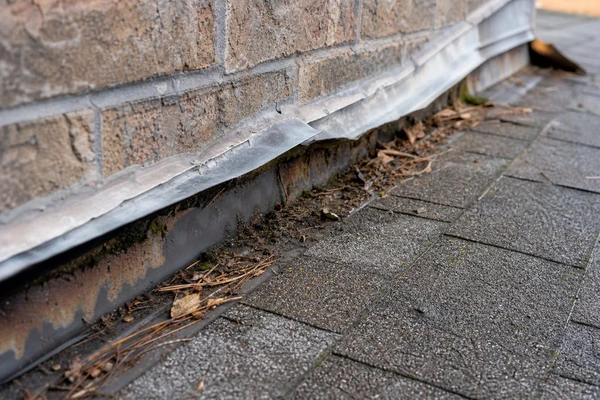
Roof and wall flashing junction
On the outside of the house (best done with dry skies so you can see any problems better), look for any lifting shingles, wide open spaces between them, badly rusted flashing pieces, lots of leaves or other items collecting in the area or other oddities. Take some photos here for reference as it’s likely you’ll be pulling things apart to get in there for repairs – for a local service reference, the page is at lapeyreroofing.com with further details.
Durable Reassembly
Once flashing is in good shape, replace any badly damaged shingles. Make sure each row overlaps the flashing and any rows under it so that water will always shed on top of flashing and never behind it.
Replace any siding, counterflashing or trim which was removed making sure that draining isn’t inhibited and that flashing is covered properly.
Though it may seem like a lot of work, if you’ve had leaks at the point where a wall intersects with the roof, chances are pretty good that’s where the problems lay. Though pulling back lots of siding and shingles won’t be necessary to patch a nail or mend a ripped shingle, leaks at this wall to roof transition will most likely require quite a bit of investigation.
It won’t do any good to caulk over the area (though that thick line of caulk between the siding and shingles probably means some bad leaks in the past) as the only purpose will be to temporarily mask what could be some pretty poor original installation.